
The Dual Challenge: Looking Good While Staying Functional
Content creators face a workspace challenge that office workers never encounter: your desk is not just where you work — it is part of your product. Every cable, every piece of clutter, every design choice is potentially visible to your audience. A workspace that maximizes productivity often looks terrible on camera. A workspace optimized for aesthetics often fails as an actual work environment.
The solution is intentional integration — designing a space where your neon sign, equipment, and workflow coexist harmoniously. This guide walks through the practical considerations of building a creator workspace that performs on both fronts.
Zone Your Space: The Three-Zone Creator Desk
Most creators try to do everything in one spot, leading to chaos. Instead, mentally divide your workspace into three zones:
Zone 1: The Performance Zone
This is what your camera sees. Everything in this zone — typically the area 3 to 6 feet behind your seating position — should be visually intentional. Your neon sign lives here, along with any curated background elements like plants, art, or bookshelves. The rule: if it is in the performance zone, it should earn its place visually.
Your neon sign is the anchor of this zone. Position it at eye level or slightly above when seated — this creates a natural focal point that draws the viewer gaze without competing with your face. Avoid placing it directly behind your head, as this creates a distracting halo effect.
Zone 2: The Work Zone
This is your desk surface — monitors, keyboard, mouse, microphone, and everything you touch while creating. The work zone should be optimized for ergonomics and efficiency, not camera aesthetics. The key insight: your work zone is mostly below the camera frame in a standard face-cam setup, so you have more flexibility here than you think.
Keep your desk surface clean but functional. A monitor riser with storage underneath hides clutter while raising your screen to a comfortable height. A boom arm for your microphone keeps it off your desk entirely. The goal is a workspace that feels spacious and organized, even if the camera never sees the bottom half.
Zone 3: The Support Zone
This is everything the camera never sees — cable management, storage, charging stations, equipment cases. The support zone should be ruthlessly practical. Use adhesive cable clips under your desk to route wires, a pegboard on the wall behind your monitors for frequently used gear, and drawers or bins for everything else.
Do not underestimate the psychological benefit of a clean support zone. When your off-camera space is organized, you feel more professional — and that confidence shows up in your content.
Cable Management: The Silent Production Killer
Nothing ruins the aesthetic of a neon-lit workspace faster than visible cables snaking across the frame. Here is a systematic approach:
Step 1: Identify every cable in your setup. Power cords for monitors, PC, laptop charger, microphone, camera, ring light, neon sign, phone charger, and any accessories. Most setups have 8 to 15 cables — far more than creators realize.
Step 2: Route cables behind and under, never across. Use a cable management tray mounted under your desk for power strips and excess cable length. Run cables along desk legs or wall edges using adhesive clips. For cables that must cross open space, use braided cable sleeves that look intentional rather than accidental.
Step 3: The neon sign cable deserves special attention. Most neon signs have a thin power cable that runs from the sign to an outlet. If your sign is wall-mounted, run the cable straight down the wall and conceal it with a paintable cable channel that matches your wall color. If desk-mounted, route it along the back edge of the desk and down a leg.
Step 4: Test on camera. After managing your cables, record a test video and scrutinize every inch of the frame. A single visible cable that you overlooked will bother you every time you review your footage.
Lighting Integration: Your Neon in Context
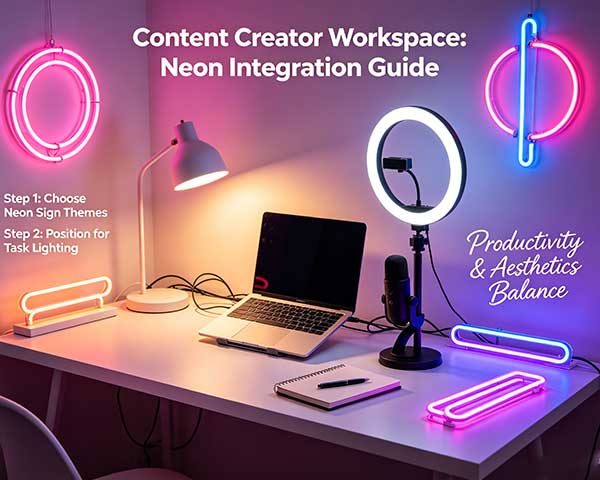
Your neon sign should not be the only light source in your workspace. Layer it with other lighting to create depth:
- Task lighting: A small desk lamp or monitor light bar for late-night editing sessions. Keep it warm-toned to match your neon sign.
- Ambient lighting: LED strip lights behind your desk or monitor create a soft backlight that separates your workspace from the wall behind it. Choose a color that complements — not matches — your neon sign.
- Natural light: If possible, position your desk perpendicular to a window rather than facing it or having it behind you. Side light is the most flattering and easiest to control with curtains.
The goal is a lighting ecosystem where each source has a distinct role. Your neon sign provides the focal point and brand identity. Task lighting supports your work. Ambient lighting creates atmosphere. Together, they make your workspace feel layered and professional.
Multi-Purpose Setup: Streaming, Filming, and Working
Most creators do not have separate spaces for streaming, filming, and everyday work. Your setup needs to transition between these modes quickly:
- Streaming mode: Neon on at 40 percent, ring light on, camera active, microphone positioned. The performance zone is fully visible.
- Filming mode: Same as streaming but with any additional lights needed for your camera setup. If you film in a different position, your neon sign should still be visible — it is part of your brand consistency.
- Work mode: Neon off or at 10 percent for gentle ambiance. Workspace optimized for productivity — monitors front and center, reference materials accessible, no cameras running.
The ability to switch between these modes in under two minutes is the hallmark of a well-designed creator workspace. If transitioning requires moving furniture or rerouting cables, your setup needs refinement.
Ergonomics Matter for Creators Too
Creators often neglect ergonomics because they are focused on how things look rather than how they feel. But consider this: if streaming or filming causes back pain, you will create less content. Your setup must support long sessions comfortably:
- Monitor height: The top of your screen should be at or slightly below eye level. Use a monitor arm or riser to achieve this.
- Chair: Invest in a proper ergonomic chair before upgrading any other equipment. You sit in it for hours — it is the foundation of your workspace.
- Neon sign placement: If your sign causes you to crane your neck or sit at an awkward angle to keep it in frame, reposition it. Your physical comfort is more important than the perfect camera composition.
Seasonal Refreshes: Keeping Your Workspace Current
A static workspace becomes visually stale over time, both for you and your audience. Plan for small seasonal updates:
- Quarterly: Rearrange desk items, swap in a new plant, change your desktop wallpaper. Small changes keep the space feeling fresh.
- Bi-annually: Consider rotating your neon sign or adding a second one. A different phrase or color palette can reinvigorate your content without a complete overhaul.
- Annually: Evaluate your entire setup. What is working? What is frustrating? Does your neon sign still reflect your brand? An annual refresh keeps your workspace aligned with your evolving creative direction.
The Workspace as an Investment
Your workspace is where your content is born. Every hour you spend in it, every video you film, every stream you broadcast — the environment shapes the output. A well-designed creator workspace with a custom neon sign as its centerpiece is not an expense. It is an investment in the quality and consistency of your content. Design the neon sign that will anchor your creator workspace and build a space worth creating in.