
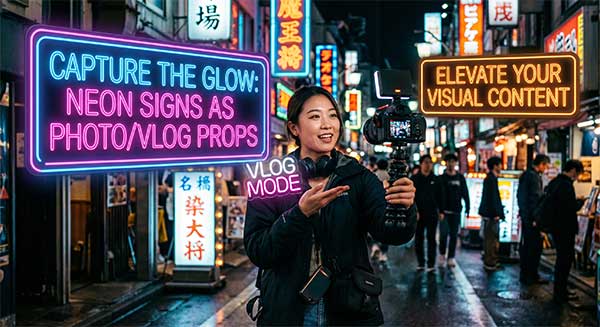
A neon sign is one of the few props that works in every kind of content: a portrait, a talking-head vlog, a flat lay, a product shot, a podcast backdrop. But it only looks expensive on camera when three things are right — the size is big enough for the lens, the placement keeps the glow off your face, and the brightness is dialled down instead of left at full. Get those wrong and a beautiful sign turns into an orange cast on your cheek and a blown-out white blob in the background. This guide walks through the whole decision in the order you actually make it: which sign to buy, what size reads on camera, where to put it, how to shoot it, how to power it, and what a creator-grade prop costs.
Related products: GG – Competitive Gaming Backdrop, Respawn – Gaming Comeback Sign, In the Works – YouTube Project Neon, Capture the Moment – Photography Studio Prop.
Related products: Good Things Are Coming Neon Sign, Level Up Your Space – Custom Neon Signs.
What Makes a Neon Sign a Better Photo Prop Than a Lamp?
A lamp lights a room. A neon sign does something different — it carries the message of the frame. When the sign says “This Is 30”, the photo is a birthday photo before anyone reads the caption. That narrative quality is the real reason creators keep them in the kit, and it comes with four practical advantages.
It shapes a subject instead of washing them out. Placed behind and to one side, a neon sign acts as a rim light: it traces the shoulder and hairline and separates your subject from the wall behind them. That is the depth that makes a phone portrait look like it was shot on a set.
Colour does the mood-setting for you. A pink sign reads playful, blue reads cool and calm, warm white reads intimate. You change the emotion of a shot by changing the sign, not the lighting rig.
It runs cool. LED neon is silicone tubing with the diodes sealed inside, driven by a low-voltage 12V supply rather than the 3,000V+ that traditional glass neon needs. Nothing gets hot to the touch, so a subject can sit, lean or pose against the sign for a long shoot without the uncomfortable flush that tungsten studio lights cause.
It moves. A 16 to 24 inch sign is light enough to carry from a wall to a table to a tripod in one session, which means one purchase covers portraits, flat lays and b-roll.
Which Neon Sign Size Reads Best on Camera?
This is where most creators lose a shoot. A sign that looks substantial on your wall often looks tiny on a webcam feed, because wide-angle lenses on webcams and phones compress background objects — expect a background prop to appear roughly 20 to 30% smaller on screen than it does in the room. Size up accordingly, or move the sign closer to the lens.
Letter height matters more than overall width, because it is the letters that have to be legible in a still. As a starting point: at about 5 feet from the lens, letters need to be 4 to 6 inches tall; at 10 feet, 6 to 8 inches; at 20 feet, 10 to 12 inches. Cursive and script fonts read smaller than their nominal height because of the thin strokes, so add 20 to 30% if you are using a script face.
| Sign width | How it reads on camera | Best for |
|---|---|---|
| 8″–12″ | Small accent — must sit close to the lens to register | Flat lay, desk b-roll, product shots |
| 16″ | Reads as a background detail behind a subject at 2–3 ft | Desk vlogs, close talking-head shots |
| 24″ | The safe middle — fills roughly a third of a 1080p frame at 3 ft behind the subject | Portrait backdrops, main vlog wall |
| 36″ | Dominant background element; survives a wide or full-body frame | Studio walls, standing shots, podcast sets |
| 48″+ | Needs a wide frame; will overpower a close-up | Backdrop walls, event and group photography |
The 24×16 inch sign is the most popular custom size for a reason: it fits above a desk or bed, takes two to four words at a readable letter height, and lands in the frame without crowding it. If you are between two sizes and the sign will live on camera, take the larger one — the 20 to 30% shrink is real, and you cannot add size in post.
Before you order, tape the proposed dimensions onto the wall with painter’s tape, stand at your normal shooting distance, and look at the taped rectangle through your phone camera rather than with your eyes. That single check catches most sizing errors. Our neon sign size guide has the full size chart and the wall-to-sign ratios if you want to work it out from your wall measurements instead.
Portrait Photography: Where Do You Place a Neon Prop?
Placement is a geometry problem, and it has one hard rule: keep the sign at least 30 degrees off the line between your camera and the subject’s face. Imagine a line running from the lens to the eyes; keep the neon outside a 60-degree cone centred on that line. This does two things — it stops the sign appearing as a bright reflection in glasses, and it stops the glow landing flat on the front of the face and flattening the features.
For a moody portrait, dim the ambient light and let the sign do the work as the primary source, positioned behind and to one side of the subject. The result is a coloured rim light on one edge of the face and a soft fall-off across the rest, which reads far more cinematic than even front lighting. For a brighter, editorial look, keep your main light on the face and use the sign purely as a background element, framed so it occupies roughly one third of the image — a clean rule-of-thirds composition rather than a sign dead-centre behind the head.
Two details that separate a good frame from an amateur one: watch for glossy surfaces in the background (posters, framed prints, a shiny desk) — they reflect the sign the same way glasses do, so move them or move the sign. And check the sign is not brighter than the face, or the camera will expose for the neon and leave your subject in silhouette.
Vlog and Video Setups: Framing, Colour Cast and Flicker
On video the sign should be the third layer of your lighting, not the first. Treat your key light (ring light, softbox or window) as the brightest element on your face, a dimmer fill on the opposite side, and the neon as a background accent dimmed to roughly 30 to 50% of its maximum brightness. That last number matters: camera sensors have limited dynamic range, so a sign at full power forces the camera to choose between a blown-out sign and an underexposed face. Most Y SIGNS models include remote-controlled dimming, and a dimmer is one of the cheapest upgrades you can add to a creator sign.
Match the colour temperature or accept the clash deliberately. A warm white neon in the 2700–3000K range is the most flattering choice against skin; if your key light is a 5600K daylight source and your sign is warm, the difference shows up as an orange halo that looks like a white balance error rather than a style choice. Either bring the key light warmer, or commit to the contrast on purpose.
Then deal with flicker. LED signs are dimmed by pulsing the driver, and if that pulse beats against your shutter speed you get banding or a visible flicker in the footage. Setting your shutter to 1/50 or 1/60 of a second at 24 or 30 fps — a multiple of the local mains frequency — removes it in most cases; nudging the brightness up or down slightly is the other quick fix. If you shoot a lot of video, the deeper causes are covered in our guide to flicker-free LED neon for content creators.
One last framing tip: if the camera’s autofocus keeps hunting, the bright sign is pulling focus away from your face. Switch to manual focus, lock it on your eyes, and let the sign stay slightly soft in the background — that softness actually reads as depth. For the full technical treatment of colour temperature, the three-light rule and off-axis placement, see neon signs and video lighting for content creators.
Flat Lay and Product Photography With Small Neon Signs
Small signs — 8 to 12 inches — are the most under-used prop in product photography. In a flat lay, a compact neon sign placed alongside the products adds a second light source and a layer of visual interest that a plain backdrop cannot match, and because it is cool-running it can sit directly on the same surface as the items without risk to them.
Angle the sign slightly upward using a small prop stand so it throws light across the arrangement instead of straight at the lens. Shoot from a shallow angle rather than straight down if you want the sign’s glow to read as glow; a direct overhead shot flattens the light into a thin line. And keep the sign off the same axis as any glossy product packaging — a reflection of the sign on a bottle or box is the one thing that will ruin an otherwise clean shot.
If you shoot events or a photo booth setup as well as studio work, the same sizing logic applies at a larger scale — see our notes on neon signs for photo booth backdrops.
How Do You Power and Mount a Neon Prop in a Studio or on Location?
Power is simpler than people expect. LED neon runs from a low-voltage 12V adapter with 100–240V input, so the same sign works in a US, UK or EU studio with nothing more than a plug adapter — no transformer, no electrician. A mid-range 24 to 36 inch sign typically draws around 15–20W, which is low enough that a multi-sign setup will not trouble a standard socket.
For a fixed studio wall, mount with the included hardware; most signs go up in under 15 minutes with no drilling skill required beyond a level and two screws. For a sign that moves between setups, a shelf or desk stand is the fastest option, and a suction window mount works if you shoot against glass. If your set changes shape often, a battery-powered version removes the cable from the frame entirely — worth the small premium for event and location work where you cannot guarantee a socket.
When you travel with a prop, pack it in its original box, remove the power supply first to protect the connector, and never coil the tube tightly — the acrylic backing is what keeps the shape, and it does not enjoy being bent.
What Do Creator Neon Props Cost?
Creator-sized signs sit in the affordable part of the market. Most custom LED neon falls between $80 and $500, and the sizes that work on camera cluster at the lower end of that.
| Size (W × H) | Typical price range | Typical use |
|---|---|---|
| 12″ × 8″ (30 × 20 cm) | $80 – $120 | Flat lay, desk accent |
| 16″ × 12″ (40 × 30 cm) | $100 – $160 | Desk vlog backdrop |
| 24″ × 16″ (60 × 40 cm) | $140 – $220 | Portrait and vlog wall (the sweet spot) |
| 36″ × 24″ (90 × 60 cm) | $220 – $350 | Studio wall, full-body shots |
| 48″ × 36″ (120 × 90 cm) | $350 – $550 | Backdrop walls, group photography |
A standard 24×16 inch LED sign averages roughly $99–$149 including basic mounting hardware and a dimmer. From there, the add-ons that matter for a shoot are modest: dimming adds about $15–$25, RGB or app control $30–$60, a coloured or printed acrylic backing $50–$100, and a battery version $15–$30 over the plug-in model. Keeping the message in one bold colour and using a second only as a small accent keeps the price close to single-colour while still giving you a two-tone look on camera. For the full breakdown — size, complexity, colour channels, backings and shipping — see the custom neon sign price guide.
Studio Care: Keeping a Neon Prop Camera-Ready
A sign that lives on a studio wall collects dust faster than one in a bedroom, and dust shows up as a dull, uneven glow on camera long before it is visible to the eye. Wipe the tubing gently with a damp microfibre cloth between shoots, dampening the cloth first rather than spraying liquid at the sign. Store it flat or hung vertically in a dry, cool space when it is not in use.
Expect the LED module to be rated for around 50,000 hours on a mid-range sign, and up to 100,000 hours on a premium build — years of regular shooting. If a sign stops working, the most common culprit is the power adapter rather than the tube, and it is usually the cheapest part to replace. Do not open the sign to chase a fault during the warranty period; that voids coverage. Send a photo or a short video of the problem instead and a replacement adapter can often ship without you returning the sign.
FAQ: Neon Signs for Photography and Vlogging
- What size neon sign should I buy for photos? A 24×16 inch sign is the safe default for portraits and vlog walls. Size up 20–30% from whatever looks right in the room, because webcam and phone wide-angle lenses make background props appear smaller on screen.
- Will a neon sign flicker on camera? Sometimes — it is usually dimmer pulse beating against the shutter. Set the shutter to 1/50 or 1/60 of a second at 24 or 30 fps, or shift the brightness slightly, and it normally disappears.
- Can I use a neon sign as my main light? Not for a talking-head shot. Treat it as a background or rim light and dim it to 30–50%, keeping the key light on the face so the sign adds atmosphere rather than colour cast.
- Do neon signs get hot on set? No. LED neon runs on a low-voltage 12V supply and stays cool to the touch, so subjects can pose against it through a long shoot.
- How much should a creator neon prop cost? Most creator-sized custom LED signs land between $80 and $220, with a dimmer included or adding only $15–$25.
- Can I travel with a neon sign? Yes — 100–240V input means only a plug adapter is needed abroad. Pack it in the original box and remove the power supply to protect the connector.
If you are building a studio wall, a vlog backdrop or a set of props that has to survive daily shooting, the right sign is the one sized for the lens, not the one that looks right in the room. Start from your phrase, font and dimensions in the custom neon sign builder and we will show you the exact size on a proof before anything is made.