
The moment your custom neon sign arrives is exciting—but rushing the unboxing process can lead to disappointment. Proper neon sign unboxing ensures your investment arrives safely and you catch any issues while they are still covered by the seller’s shipping warranty. This complete guide walks you through every step of receiving, inspecting, and setting up your new sign.
After going through the custom neon sign ordering process and waiting for your sign to be made and shipped, you want the final step to be smooth. With proper neon sign shipping and unboxing procedures, you will have your sign glowing on the wall within 15 minutes of opening the package.
1. Before You Open: Inspect the Package
Before even opening the box, inspect the shipping package for signs of damage. Look for: crushed corners or significant dents, water damage or stains, punctures or tears in the outer box, and rattling sounds that suggest broken internal components. If the package shows obvious damage, take photos before opening. For high-value signs, consider recording the unboxing video as proof of the sign’s condition upon arrival.
2. Safe Unboxing Steps
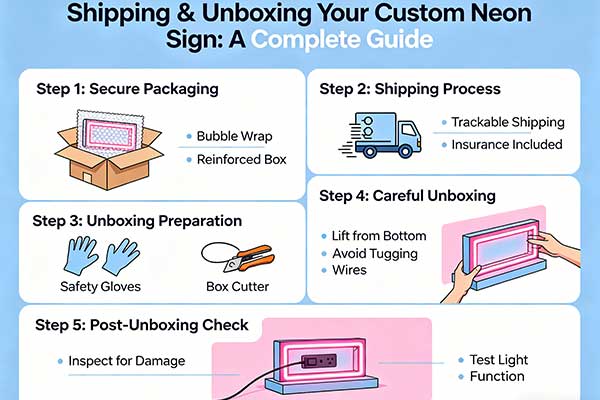
Open the box on a clean, flat surface with good lighting. Use scissors or a box cutter to cut the tape—cut carefully away from the box center to avoid nicking the sign inside. Remove the top layer of padding material (foam, bubble wrap, or air pillows). Lift the sign out gently—most signs are sandwiched between foam layers. Place the sign face-up on a soft surface (a towel or blanket works well). Remove any plastic film or protective covering from the sign face.
3. The Inspection Checklist
Once the sign is unboxed, inspect every element: LED Channels: Check for cracks, kinks, or loose sections in the silicone tubing. Backing Panel: Examine for scratches, dents, or warping. Letter Alignment: Verify all letters and shapes are properly aligned and attached. Mounting Points: Confirm mounting brackets or holes are present and undamaged. Power Connection: Inspect the connector where the sign meets the power cable—it should be secure and clean. Power Supply: Check the transformer for dents, cracks, or burn marks.
4. The First Power-On Test
Before mounting, plug in the sign and test it. Connect the power supply to the sign and plug into a wall outlet. The sign should light up immediately on single-color models. For remote-controlled or neon signs with remote control, test all remote functions: on/off, brightness levels, and color modes (if RGB). Walk around the sign and observe it from different angles—the glow should be even with no dark spots. If everything works, proceed to installation.
5. What to Do If Your Sign Is Damaged
If your sign arrives damaged or does not work: take clear photos of the damage from multiple angles, photograph the shipping box showing any external damage, contact the seller within 24 hours with your order number and photos, and describe the issue clearly. Reputable sellers will offer a replacement, repair, or refund. Most custom neon signs are covered by a 30-day arrival warranty and a 1-2 year manufacturer warranty. Do not attempt to repair the sign yourself during the warranty period.
6. Mounting After Unboxing
Once the sign passes inspection, it is time to mount it. Select your mounting method based on your wall type and preferences. For most indoor installations, adhesive strips or screws with included brackets work perfectly. If you are a renter or prefer damage-free installation, see our guide to installing neon signs without damaging walls. For outdoor signs, ensure weatherproof mounting with marine-grade hardware.
7. Storing Packaging Materials
Keep the original packaging for at least 30 days after delivery—this covers the return window if you need to send the sign back. After the return period, you can repurpose or recycle the box. However, if you plan to move or store the sign seasonally, keeping the custom foam inserts is highly recommended. They are specifically molded to your sign’s shape and provide the best protection for neon sign storage.
Related Articles
- Ordering Custom Neon Signs Online: What to Expect
- How to Install Neon Signs Without Damaging Walls
- How to Take Care of Your Neon Sign
- Custom Neon Sign Cost Guide
10. Frequently Asked Questions (FAQ)
How long does shipping take for custom neon signs?
Standard shipping takes 3-7 business days domestically after production. International orders take 10-20 business days. Rush shipping is available at an additional cost.
Do I need to sign for delivery?
Most carriers require a signature for packages valued over $100. You can authorize release or arrange pickup at the carrier’s facility if you will not be home.
Can I return the sign if I change my mind?
Custom neon signs are personalized products, so most sellers do not accept returns for change of mind. However, if the sign has a manufacturing defect, it is covered by warranty.
What if my sign arrives and I do not like the color?
Check the digital proof before approving production—this is your last chance to verify colors. If the color appears different from the proof when it arrives, contact the seller immediately.
Proper neon sign shipping and unboxing is the final step in your custom sign journey. By carefully inspecting the package, methodically checking the sign, and performing a power test before mounting, you ensure your sign arrives in perfect condition and provides the beautiful glow you envisioned. When you follow this guide, that first moment of light is pure satisfaction.
7. International Shipping Considerations
For customers ordering neon signs from international manufacturers, additional shipping considerations apply. Customs duties and import taxes vary by country and can add 10-30% to your total cost—check with your local customs office before ordering. Delivery timelines for international orders typically range from 10-25 business days, significantly longer than domestic shipping. Ensure your manufacturer uses trackable shipping with insurance, as international packages face higher risk of damage or loss. Some countries have specific electrical safety certification requirements that your neon sign must meet—verify that your manufacturer’s products comply with local regulations such as CE (Europe), UKCA (UK), or PSE (Japan) standards. Language support is another factor; ensure the manufacturer provides clear English (or your local language) instructions, and confirm that any smart features or apps support your region’s electrical standards and WiFi frequencies. Returns or exchanges for international orders are significantly more complex and costly than domestic transactions, so extra care during the ordering process is essential. Despite these additional considerations, international ordering often provides access to superior quality or more affordable options that justify the extra planning.
Looking for the perfect neon sign for your needs? Check out our fresh & local – farmhouse kitchen wall, our noob – casual gaming & fun corner, or our walk ins welcome neon sign – led hair salon light to find exactly what you’re looking for.