Setting up an outdoor neon display is the ultimate way to modernize your holiday curb appeal. However, the transition from an indoor novelty to an exterior landmark requires more than just a plug and a prayer. In 2026, installation is as much about weatherproofing and electrical safety as it is about aesthetics.
Successful outdoor neon installation relies on the “Seal and Secure” protocol. You must use IP67-rated waterproof connectors, mount the sign with stainless steel hardware to prevent rust-bleeding on your facade, and always utilize a Drip Loop to prevent water from traveling down cables into power outlets. When done correctly, an LED neon installation can withstand a month of snow and wind while consuming 80% less energy than traditional bulb displays.
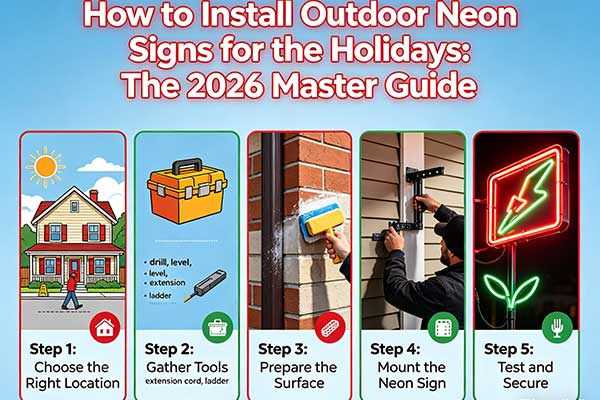
1. Pre-Installation: The “Dry Run” Phase
Before you climb the ladder, perform a “Dry Run” in your garage or living room.
-
Test the Glow: Plug the sign in to ensure all segments are firing. In 2026, many signs are RGB-enabled; check that the holiday “Red and Green” cycles work via your app.
-
Measure the Run: Your sign likely has about 10 feet of lead wire. Measure the distance from your mounting point to the nearest GFCI (Ground Fault Circuit Interrupter) outlet. If you need an extension cord, it must be outdoor-rated (typically orange or green and thicker).
-
IP Rating Verification: Ensure the sign and the driver are at least IP65 (water-resistant) or, ideally, IP67 (fully waterproof).
2. Mounting Techniques: Surface-Specific Advice
Different surfaces require different hardware. Never use indoor adhesive strips outdoors; they will fail the moment humidity hits.
| Surface | Recommended Hardware | Pro Tip |
| Brick / Stone | Masonry anchors & Stainless screws | Drill into the mortar, not the brick, to avoid permanent damage. |
| Wood Siding | Stainless steel “P-Clips” | Use extra clips near corners to prevent wind vibration. |
| Windows | Heavy-duty suction cups or “Clear-Mount” brackets | Ensure the glass is cleaned with alcohol first for maximum suction. |
| Fences | UV-rated zip ties or Aluminum channels | Aluminum channels provide a perfectly straight “professional” line. |
Key Data: In 2025, 60% of outdoor signage failures were caused by wind-load stress. Using “P-Clips” every 12 inches instead of every 24 inches reduces the risk of the sign “peeling” off the wall during a winter storm.
3. The “Drip Loop” & Electrical Weatherproofing
Water follows the path of least resistance. If your cable runs straight from the sign to the outlet, rainwater will slide down the wire and pool inside your electrical socket—a major fire hazard.
The 3-Step Waterproofing Protocol:
-
Create the Drip Loop: Always let the cable hang lower than the entry point (the outlet or the wall hole) before plugging it in.
-
Weatherproof the Driver: The “Power Brick” is the most vulnerable part. If it isn’t IP67, house it in a ventilated outdoor weather box.
-
Seal the Joins: If your sign has a “DC Jack” connection outside, wrap the connection in self-fusing silicone tape. Unlike electrical tape, this creates a vacuum-sealed, waterproof bond that won’t get gummy in the heat or brittle in the cold.
4. Managing the “Instagram Glow” (Brightness Control)
In 2026, light pollution regulations are stricter in many residential zones.
-
The 50% Rule: Most neon signs are too bright for night-time residential use at 100%. Use a dimmer to set the sign to 50–60%. This reduces “light bleed” in photos and is more neighbor-friendly.
-
Smart Timers: Don’t leave the sign on 24/7. Use a smart plug (like Kasa or Wemo) to sync the sign with local “Sunset” times. This saves energy and extends the 50,000-hour lifespan of the LEDs.
5. Frequently Asked Questions
Q1: Can I drill through my siding to hide the wires?
Yes, but you must seal the hole with 100% silicone caulk. Apply the caulk inside the hole and around the wire entry point to prevent moisture from getting behind your siding, which can cause rot or mold over time.
Q2: Will my neon sign fail if it gets buried in a snowbank?
If your sign is IP67-rated, it can handle being submerged in snow. However, snow is heavy. Ensure your mounting clips are secured into “studs” or solid wood so the weight of the snow doesn’t pull the sign off the wall.
Q3: How do I remove the sign after the holidays without leaving ugly holes?
If you are a renter or concerned about your facade, consider mounting the neon sign to a clear acrylic sheet first, then hanging that sheet using “Over-the-Door” hooks or temporary “Siding Hooks” that clip into the gaps of your vinyl siding without needing to drill.